前言
关于HarmonyOS脚手架,本篇是系列的第二篇,主要实现UI组件文本和图片的常见效果查看,本身功能特别的简单,其目的也是很明确,方便大家根据效果查看相关代码实现,可以很方便的进行复制使用,当然了,这些所谓的小功能都是开胃小菜,脚手架的最终成型,势必可以惊艳到大家,大家可以持续关注。
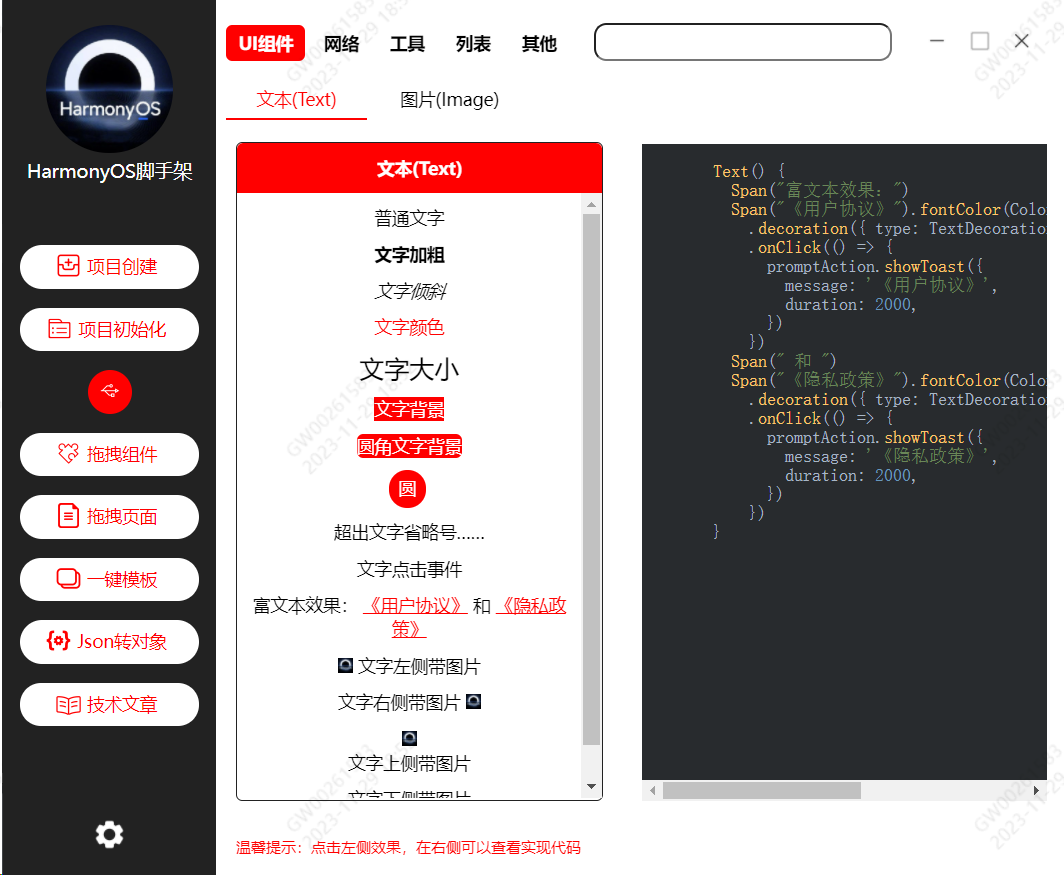

一、常见文本效果代码
1、普通文字
2、文字加粗
3、文字倾斜
4、文字颜色
5、文字大小
5、文字背景
6、圆角文字背景
7、圆背景
8、省略文字
9、文字点击事件
10、富文本效果
11、文字左侧带图片
12、文字右侧带图片
13、文字上侧带图片
14、文字下侧带图片
二、常见图片效果代码
1、普通图片
2、加载动图
3、网络图片
4、圆角图片
5、圆形图片clip设置
6、圆形图片borderRadius设置
7、圆角图片边线链式调用
8、圆角图片边线border调用
9、圆形图片边线border调用
10、圆形图片边线链式调用
11、占位图片设置
12、图片加载错误设置
13、获取图片的宽高
14、黑白渲染模式图片
15、图片填充效果Cover
16、图片填充效果Fill
17、图片填充效果Contain
三、脚手架实现分析
四、相关总结
声明:本站所有文章,如无特殊说明或标注,均为本站原创发布。任何个人或组织,在未征得本站同意时,禁止复制、盗用、采集、发布本站内容到任何网站、书籍等各类媒体平台。如若本站内容侵犯了原著者的合法权益,可联系我们进行处理。