文章目录
语法
属性绑定
Angular的双向绑定语法是方括号和圆括号的组合[()]。[]进行属性绑定,()进行事件绑定。
1. 语法
// 在属性上用{{}}
<p title="{{title}}">

// 使用[]做属性绑定
<p [title]="title">

举例:
//html文件
    <p>属性绑定</p>
    <div [id]="'apple'">Apple</div>
    <div [id]="lemon">{{lemon}}</div>
    <div id="{{lemon}}">{{lemon}}</div>

    <div [class]="'item'">绑定Class - 1</div>
    <div [class]="itemClass">绑定Class - 2</div>

    <h3 [class.h3-dom]="h3Dome">class.h3-dom根据true决定是否显示</h3>
    <h3 [class.h3-dom]="'true'">class.h3-dom根据true决定是否显示</h3>  // 也可以渲染成功

    <h3 [class]="'h3-dom font w string'">多类名绑定</h3>
    <a [title]="product.name + ' details'">  {{ product.name }} </a>

// ts文件
  lemon : string = 'lemon'
  itemClass : string ='item-Class';
  h3Dome : boolean = true;
  product = {name: '张三'};
// home.html eg: 1 - 使用 ngModel 作为键,把该指令导出到一个局部模板变量中(如:#myVar="ngModel")
    <input [(ngModel)]="name" #ctrl="ngModel" required>

    <p>Value: {{ name }}</p>  <!--111-->
    <p>Value: {{ ctrl.value }}</p> <!--111-->
    <p>Valid: {{ ctrl.valid }}</p> <!--true-->
// home.html eg: 2
    <label for="example-ngModel">[(ngModel)]:</label>
    <input [(ngModel)]="currentItem.name" id="example-ngModel">
// home.ts
    export class HomePage {
      currentItem = {name: '张三'};
    }
// home.html   eg: 3 - ngForm中使用 ngModel
    <div>
        <form #f="ngForm" (ngSubmit)="onSubmit(f)" novalidate>
            <input name="first" ngModel required #first="ngModel">
            <br>
            <input name="last" ngModel>
            <br>
            <button>Submit</button>
        </form>

        <p>First name value: {{ first.value }}</p>
        <p>First name valid: {{ first.valid }}</p>
        <p>Form value: {{ f.value | json }}</p>
        <p>Form valid: {{ f.valid }}</p>
    </div>
引用模板变量
- 语法:在模板中,要使用井号
#来声明一个模板变量。下列模板变量#phone声明了一个名为phone的变量,其值为此<input>元素。
<input #phone placeholder="phone number" />

<!--可以在组件模板中的任何地方引用某个模板变量。这里的 <button> 就引用了 phone 变量-->
<button type="button" (click)="callPhone(phone.value)">Call</button>

// eg:1 这个是input自带value属性,{{phone.value}}会呈现test,更改input值不会有改变,因为没写ngMoudle进行双向绑定
<input #phone placeholder="phone number" value="text" />
<p>Value: {{ phone.value }}</p>

// eg:2 双向数据绑定
<input #phone type="text" id="name" class="form-control" name="name" ngModel required />
{{phone.value}}
组件绑定
父组件传子组件 @input
现在有父组件<parentlist> 和子组件<childlist>
- 配置子组件
//userlist.ts
import { Component, Input } from '@angular/core'; // First, import Input
export class ChildComponent {
@Input() item = ''; // decorate the property with @Input()
}
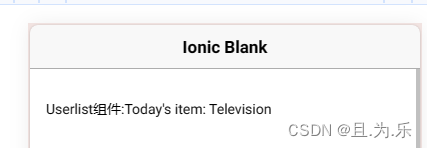
// userlist.html
Userlist组件:Today's item: {{item}}
- 配置父组件
//parentlist.ts
export class ParentComponent { // 业务逻辑
  currentItem = 'Television';
}
// parentlist.html
<parentlist [item]="currentItem"></parentlist>
运行结果如下,这样就实现了父组件的 currentItem 变量绑定给了子组件的 item
子组件传父组件 @output
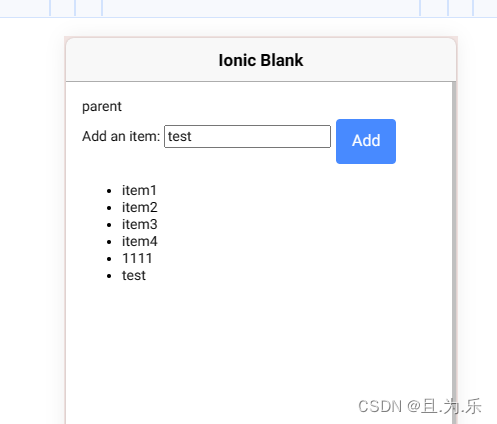
- 子组件
// 1. html
    <label for="item-input">Add an item:</label>
    <input type="text" id="item-input" #newItem>
    <button ion-button  (click)="addNewItem(newItem.value)">Add</button>

// 2. ts
import { Output, EventEmitter } from '@angular/core';

export class ChildComponent {
  @Output() newItemEvent = new EventEmitter<string>();

  addNewItem(value: string) {
    // value = "测试value";
    this.newItemEvent.emit(value);
    console.log("----"+value);
  }
}
- 父组件
// 1. html
    <child (newItemEvent)="addItem($event)"></child>
    <ul>
        <li *ngFor="let item of items">{{item}}</li>
    </ul>

// 2. ts
export class ParentComponent {
  items = ['item1', 'item2', 'item3', 'item4'];

  addItem(newItem: string) {
    this.items.push(newItem);
    console.log(newItem);
  }
}
上述可以这么理解:
- 当触发子组件的
addNewItem()函数时,页面数据双向绑定去拿到一个值给到newItemEvent。 - 父组件根据
@outpiy newItemEvent拿到的值,即作为参数event,去执行addItem函数给到items,然后页面输出。
EventEmitter
Angular 提供了一个
EventEmitter类,它用来通过组件的@Output()装饰器 发送一些值。EventEmitter扩展了RxJS Subject,并添加了一个emit()方法,这样它就可以发送任意值了。当你调用emit()时,就会把所发送的值传给订阅上来的观察者的next()方法。
EventEmitter与指令@Output一起在组件中使用以同步或异步方式发送自定义事件,并通过订阅实例来注册这些事件的处理程序。
EventEmitter语法:
emit() : 发出包含给定值的事件。
subscribe(): 注册此实例发出的事件的处理器
- 子组件
// 1.html
    <div class="zippy">
        <div (click)="toggle()">点击该文本</div>
        <div [hidden]="visible">
            <ng-content></ng-content>
        </div>
    </div>

// 2.ts
export class ChildComponent {
  visible = true;
  // tslint:disable-next-line: no-output-native
  @Output() open = new EventEmitter<any>();
  // tslint:disable-next-line: no-output-native
  @Output() close = new EventEmitter<any>();

  toggle() {
    this.visible = !this.visible;
    if (this.visible) {
      this.close.emit('关闭');
    } else {
      this.open.emit('打开');
      this.open.subscribe((data) => {
        console.log('open subscribe:' + data);
      });
    }
  }
}
- 父组件: 子组件去运行
toggle()函数去赋值给open或者close,父组件根据拿到的值去运行onOpen()或者onClose语句。
// 1.html
    <child (open)="onOpen($event)" (close)="onClose($event)">我是child组件的内容</child>

// 2. ts
export class ParentComponent {
  onOpen(e) {
    console.log(e);
  }
  onClose(e) {
    console.log(e);
  }
}
@ViewChild
@ViewChild可以获取到当前组件视图中的单个元素
@ViewChild('selector', {read: ElementRef, static: false})  selector;
1. selector - 要查询的指令类型或名称。
2. read - 用于从查询到的元素中读取不同的令牌。
3. static - 如果为 true,则在变更检测运行之前解析查询结果,如果为 false,则在变更检测之后解析。默认为 false。

// eg:1
字符串形式的模板引用变量(比如可以使用 @ViewChild('cmp') 来查询 <my-component #cmp></my-component>
里面的cmp就是模板应用变量

// eg:2
我想通过#myname去查询原始,并将返回ViewContainerRef类型
@ViewChild('myname', {read: ViewContainerRef}) target;
例子如下:
// 1.home.html
    <p #myLabel>icon</p>
// 2. home.ts
export class HomePage {
  @ViewChild('myLabel') temp;
  ngAfterViewInit(): void {
    console.log(this.temp);} // ElementRef {nativeElement: p}
}
@ViewChildren获取子组件对象列表
管道
PIPE,翻译为管道。Angular管道是编写可以在HTML组件中声明的显示值转换的方法。Angular管道之前在AngularJS中被称为过滤器,从Angular 2开始就被称为管道。管道将数据作为输入并将其转换为所需的输出。
简单来说,就是Angular Pipes可以帮我们把我们的输入,包括字符串,整数和日期等等,按照我们的需要转化为特定的格式并且在浏览器中显示。通过插值表达式,我们可以定义管道并且在特定的情况下使用它,在Angular中提供给了我们许多种不同类型的管道,当然,你甚至还可以去自定义管道。
更多管道官当网址
总结:管道就是一个方法,可以将你的输入转化为特定的你需要的输出格式,Angular提供给了我们许多的内置管道,当内置管道不满足你的要求的时候,你还可以通过自定义管道来更加灵活的自定义输出格式。
1.时间管道
// 1. html
    {{date }}  // Mon Jan 08 2024 09:41:10 GMT+0800 (中国标准时间)
    <br>
    {{date | date:'yyyy-MM-dd'}} //  2024-01-08

// 2. ts
export class HomePage {
  date = new Date();
}
// 1.html
    <p>A: {{a | currency}}</p>  <!-- A: $0.26 -->
    <p>A: {{a | currency:'CAD'}}</p> <!-- A: CA$0.26 -->
    <p>A: {{a | currency:'CAD':'code'}}</p> <!-- B: CA$0,001.35 -->
    <p>B: {{b | currency:'CAD':'symbol':'4.2-2'}}</p> <!-- B: CA$0,001.35 -->
    <p>B: {{b | currency:'CAD':'symbol-narrow':'4.2-2'}}</p> <!-- B: $0,001.35 -->
    <p>B: {{b | currency:'CLP'}}</p> <!-- B: CLP1.35 -->

// 2.ts
export class HomePage {
  a: number = 0.259;
  b: number = 1.3495;
}
- 自定义管道
// 1. 创建指令
ng g p pipes/pipe-name
// ionic
ionic g + pipe + name

// 2. app.module.ts配置(本次的例子是基于ionic3框架)
import {PipesModule} from '../pipes/pipes.module';
  imports: [
    PipesModule,
    IonicModule.forRoot(MyApp)
  ],
// 3. pipes/test/test/ts
@Pipe({
  name: 'test', // 这个name用于下面html的管道名称
})
export class TestPipe implements PipeTransform {
  transform(value: string, ...args) {
    let value1 = "test"+value;
    return value1;
  }
}

// pages/home.html
{{lemon | test}}
常用模块
Angular 应用至少需要一个充当根模块使用的模块。 如果你要把某些特性添加到应用中,可以通过添加模块来实现。
函数
localStorage实现数据持久化
简介
Local Storage技术是一种在Web浏览器中用于客户端数据存储的机制。它允许Web应用程序在用户的本地浏览器上存储键值对形式的数据,这样用户在关闭浏览器窗口或页面后,数据仍然可以保留。这为开发者提供了一种在客户端持久保存数据的简单方式,而不必依赖于服务器。
使用
Local Storage是Web Storage API的一部分,与Session Storage不同,Local Storage的数据在关闭浏览器后仍然存在。它使用键值对的形式存储数据,其中键和值都是字符串。该技术基于域名,即同一域名下的所有页面共享相同的Local Storage。
使用方式也非常简单直观,使用其提供的get和set API即可。
在JavaScript中,通过localStorage对象来访问和操作Local Storage。
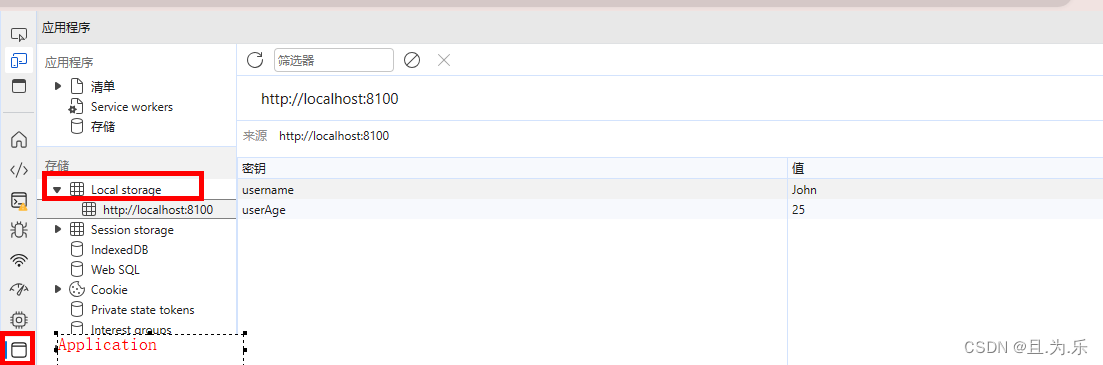
- 存储
localStorage.setItem(key,value);

// eg:home.ts
  constructor(public navCtrl: NavController,public loadingCtrl: LoadingController) {
    // 存储数据
    localStorage.setItem('username', 'John');
    // 存储数字
    localStorage.setItem('userAge', 25);
  }
- 获取:如果key不存在返回null。
localStorage.getItem(key);
- 删除:一旦删除,key对应的数据将会全部删除。
localStorage.removeItem(key);
- 全部清除
localStorage.clear();
参考文档
原文地址:https://blog.csdn.net/JUN_7777/article/details/135384610
本文来自互联网用户投稿,该文观点仅代表作者本人,不代表本站立场。本站仅提供信息存储空间服务,不拥有所有权,不承担相关法律责任。
如若转载,请注明出处:http://www.7code.cn/show_57000.html
如若内容造成侵权/违法违规/事实不符,请联系代码007邮箱:suwngjj01@126.com进行投诉反馈,一经查实,立即删除!