本文介绍: H265web.js 是一个用于在 Web 浏览器中播放 H.265 视频的 JavaScript 播放器。它支持在浏览器中直接解码 H.265 编码的视频流,提供了高效的视频播放体验。在 Element UI 项目中集成 H265web.js 可以让我们轻松实现 H.265 视频的播放功能。H265web.js 开源地址:文档地址:目前vue里集成H265web.js 还有一定的复杂度,本文作以详细介绍。

在这里插入图片描述

一、项目说明

1. H265web.js 简介

H265web.js 是一个用于在 Web 浏览器中播放 H.265 视频的 JavaScript 播放器。它支持在浏览器中直接解码 H.265 编码的视频流,提供了高效的视频播放体验。在 Element UI 项目中集成 H265web.js 可以让我们轻松实现 H.265 视频的播放功能。

H265web.js 开源地址:
https://github.com/numberwolf/h265web.js
文档地址:
https://github.com/numberwolf/h265web.js?tab=readme-ov-file

目前vue里集成H265web.js 还有一定的复杂度,本文作以详细介绍。

2. 准备环境

  • 一个 准备好的 element-ui 项目和开发环境
  • 本文基于VUE2.0

二、项目配置

1. 下载 H265web.js

我们采用直接下载 dist 的方式,而不是使用 npm 安装,据说npm对wasm不太友好(我没有实证)。
到官网找到最新版本的 releasae或者接下载整个项目:
在这里插入图片描述
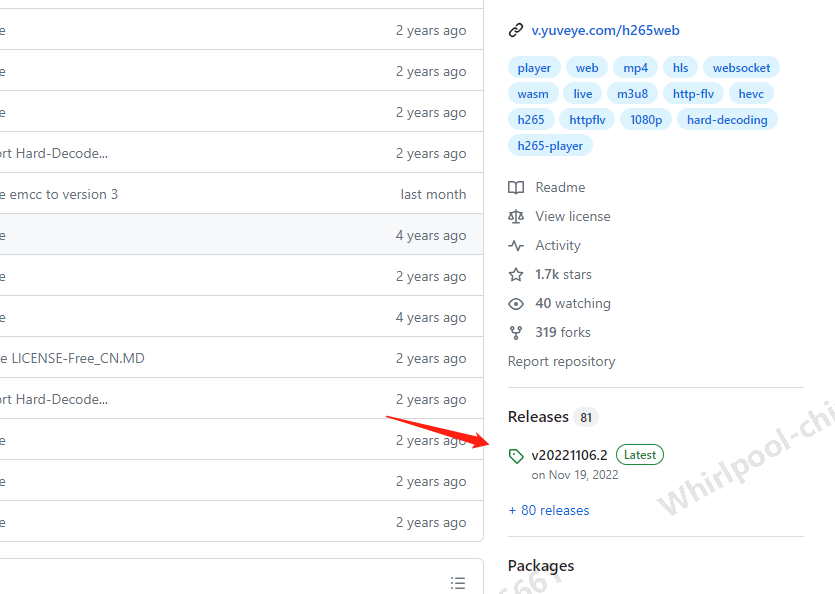
后面需要使用的是 dist/ 目录的内容。
本文参考了官方目录 example_vue2/ 里的实现代码,主要加入了对 npm 自动化构建的支持。

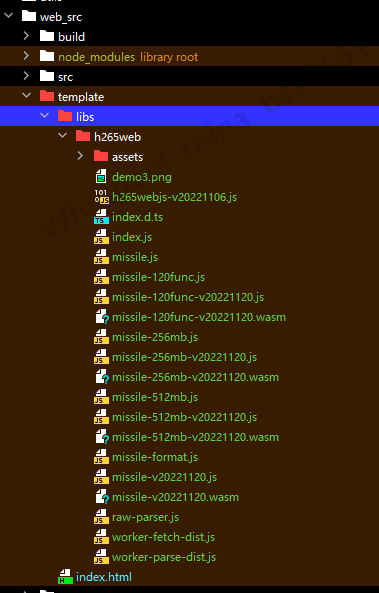
2. 在vue项目里引入 H265web

首先在 vue 项目里新建一个 template 目录,按如下方式组织文件:
在这里插入图片描述
即把 H265web.js 的dist目录,拷到 template/libs/h265web下。

index.html 是构建vue项目时使用的模板文件,内容如下:

<!DOCTYPE html>
<html lang="en">
<head>
  <meta charset="utf-8">
  <meta name="viewport" content="width=device-width, initial-scale=1">
  <title>Your App Title</title>
  <script type="text/javascript" src="static/js/missile.js"></script>
  <script src="static/js/h265webjs-v20221106.js"></script>
</head>
<body>
<div id="app"></div>

</body>
</html>

使用npm命令构建时,默认情况会在目录的 public/ 目录自动生成 index.html 文件。但是我们需要在 index.html 里引入 h265web.js 的文件,构建后再去添加引用就有些繁琐,所以自定义了此模板页方便构建。

3. 设置 vue.config.js

本步骤的目的是在 npm 构建时,自动将 h265 的库文件拷贝到构建的目标目录 。
这里重点是使用了 copy-webpack-plugin 和 html-webpack-plugin 两个构建的插件。
vue.config.js 设置

// 这一句定义在 module.exports 之前
const CopyWebpackPlugin = require('copy-webpack-plugin')
// 定义模板页位置
const HtmlWebpackPlugin = require('html-webpack-plugin')
// 在 module.exports ,加入
module.exports = {
  configureWebpack: {
    // provide the app's title in webpack's name field, so that
    // it can be accessed in index.html to inject the correct title.
    name: name,
    resolve: {
      alias: {
        '@': resolve('src')
      }
    },
    plugins: [
      new HtmlWebpackPlugin({
        template: 'template/index.html'
      }),
      new CopyWebpackPlugin([
        {
          from: 'template/libs/h265web',
          to: './static/js/'
        }
      ])
    ]
  }
}

这样在执行 npm run devnpm run build:prod时, h265web的库文件会拷到目标的 static/js 目录下。

执行构建命令的效果如下:
在这里插入图片描述

三、代码引用

1. 参照官方demo , 创建 executor.js

路径可按自己需要放置,我这里放到了src/utils下:
在这里插入图片描述
内容:

const PRESET_CONFIG = {
  player: 'glplayer',
  width: 960,
  height: 540,
  token: 'base64:QXV0aG9yOmNoYW5neWFubG9uZ3xudW1iZXJ3b2xmLEdpdGh1YjpodHRwczovL2dpdGh1Yi5jb20vbnVtYmVyd29sZixFbWFpbDpwb3JzY2hlZ3QyM0Bmb3htYWlsLmNvbSxRUTo1MzEzNjU4NzIsSG9tZVBhZ2U6aHR0cDovL3h2aWRlby52aWRlbyxEaXNjb3JkOm51bWJlcndvbGYjODY5NCx3ZWNoYXI6bnVtYmVyd29sZjExLEJlaWppbmcsV29ya0luOkJhaWR1',
  extInfo: {
    moovStartFlag: true,
    coreProbePart: 0.1,
    ignoreAudio: 0,
    autoPlay: true,
    core: 1
  }
}

// FYI. the Player class is a wrapper container provide the init and destory methods.
// you should destory the player instance at the page unshift time.
// By the way if you want to impl a progress bar you should view the normal_example.
// It's a  full example. This demo only provide a minimalist case.
// Why use class? Convenient der is enough :)
// Should I registry the instnace at a microTask? Of course.
// Pay attention to index.html. vite boy. Don't forget import the static source code :)

export class Player {
  #config = {};
  instance;
  constructor(opt = {}) {
    const { presetConfig = PRESET_CONFIG } = opt
    if (presetConfig) Object.assign(this.#config, presetConfig)
  }

  init(url) {
    this.instance = window.new265webjs(url, this.#config)
  }
}

2. 在 vue 页面里引用

html 模板

              <!-- video player content -->
              <div class="player-container">
                <div id="glplayer" class="glplayer"></div>
              </div>

js

这里是用在 dialog 里的, 在watch 的 $nextTick() 中来创建播放器, 可视需要在其它事件中使用。

import { Player } from '@/utils/executor'

watch: {
    show() {
      const that = this
      this.mrl = this.mediaObject.flv
      if (that.visible) {
        this.$nextTick(() => {
          console.info(TAG, '初始化播放器', this.show)
          const player = new Player()
          player.init(this.mrl)
          that.instance = player.instance

          player.instance.onLoadFinish = () => {
            const mediaInfo = player.instance.mediaInfo()
            console.log(TAG, 'onLoadFinish', mediaInfo)
          }
          player.instance.onPlayFinish = () => {
            console.log(TAG, 'onPlayFinish')
          }
          player.instance.do()
        })
      }
    }
  },

其它地方使用,调用 player.instance 相关的方法即可。
运行效果:
在这里插入图片描述

原文地址:https://blog.csdn.net/xundh/article/details/135951725

本文来自互联网用户投稿,该文观点仅代表作者本人,不代表本站立场。本站仅提供信息存储空间服务,不拥有所有权,不承担相关法律责任。

如若转载,请注明出处:http://www.7code.cn/show_66079.html

如若内容造成侵权/违法违规/事实不符,请联系代码007邮箱:suwngjj01@126.com进行投诉反馈,一经查实,立即删除!

发表回复

您的电子邮箱地址不会被公开。 必填项已用 * 标注