本文介绍: 找到node_modules/@dataview/datav–vue3/package.json。然后我们pnpm dev启动的时候直接报错,并且发现dataV下面有波浪线报错。最后再重新执行npm install或者pnpm install方法即可。后来发现该库中的package.json中给的出口有问题。然后在package.json中scripts中添加。新建lib文件夹,将修改好的文件放在其中。然后main.ts全局注册。
DataV官网:https://datav-vue3.jiaminghi.com/guide/
vue2中是没有问题的,这是第一次在vue3中使用发现的报错问题
报错问题
首先安装:
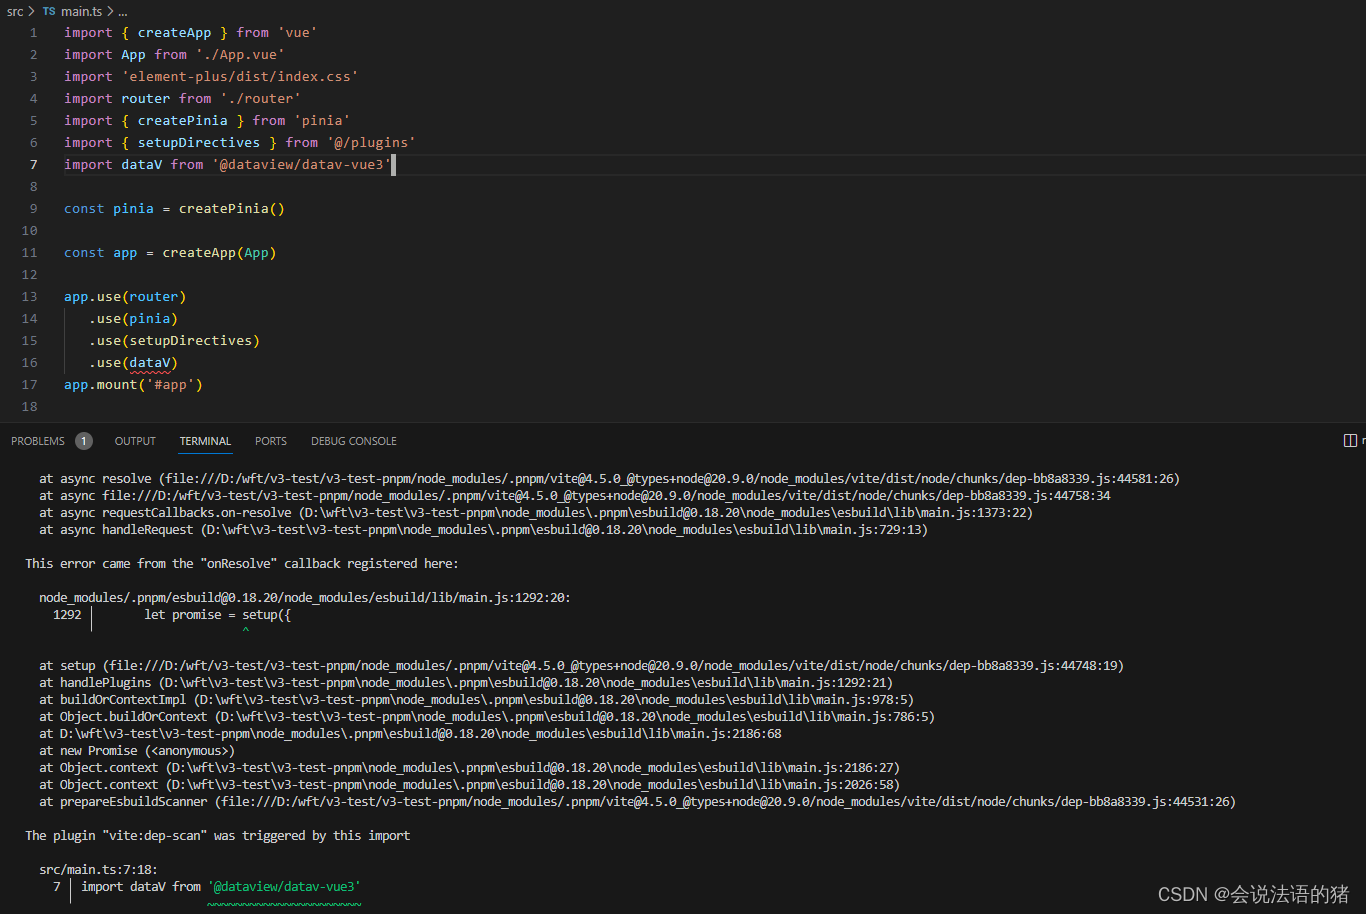
1. 全局注册报错
然后我们pnpm dev启动的时候直接报错,并且发现dataV下面有波浪线报错
2. 按需引入报错

解决:

报错补充:


声明:本站所有文章,如无特殊说明或标注,均为本站原创发布。任何个人或组织,在未征得本站同意时,禁止复制、盗用、采集、发布本站内容到任何网站、书籍等各类媒体平台。如若本站内容侵犯了原著者的合法权益,可联系我们进行处理。