一、安装samba
rpm -qa | grep samba

yum install samba -y
[root@localhost ~]# yum install samba -y
已加载插件:fastestmirror, langpacks
/var/run/yum.pid 已被锁定,PID 为 xxx的另一个程序正在运行。
Another app is currently holding the yum lock; waiting for it to exit...
  另一个应用程序是:PackageKit
    内存:xxx
    已启动: xxx
    状态  :睡眠中,进程ID:xxx
rm -rf /var/run/yum.pid
1.systemctl status smb.service # 查看状态
2.systemctl start smb.service # 启动
3.systemctl stop smb # 停止 service可以要可以不要
4.systemctl restart smb # 重启 关掉再启动
5.systemctl reload smb # 重载 如果修改了配置文件但服务器又有人在用 就可以选择重载避免服务器短时间“宕机”
6.# 设置开机自启
systemctl list-unit-files | grep smb
#显示 smb.service                                   disabled
systemctl enable smb # 设置自启
#显示 smb.service                                   enable
systemctl disable smb # 取消自启
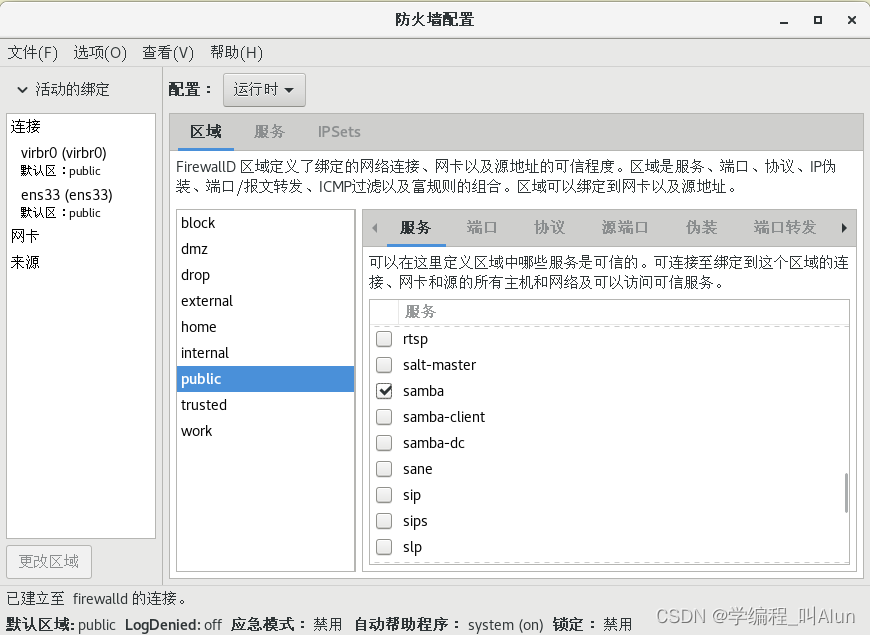
二、配置匿名访问
samba服务的配置文件在/etc/samba/smb.conf,其中里面主要包含三个部分(配置简介、全局变量、共享服务配置),这里对配置文件的内容详细不做解释,只对用到的做解释。
记得启动smb服务
vim /etc/samba/smb.conf
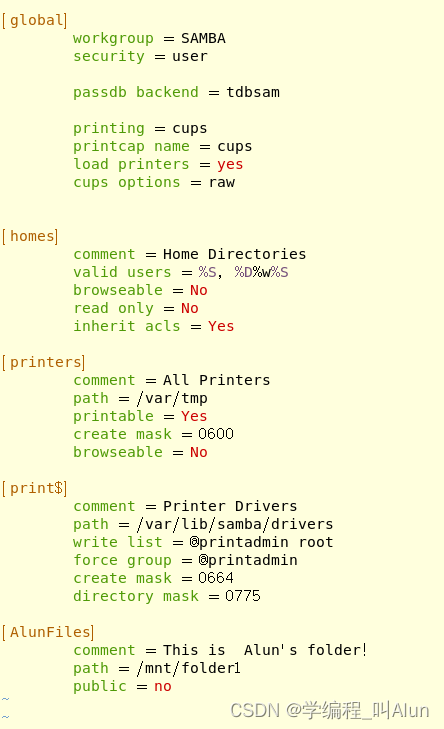
配置好的文件如下,只加了map to guest = Bad User 和 [AlunFiles]的内容
[global]
        workgroup = SAMBA
        security = user
        passdb backend = tdbsam
        printing = cups
        printcap name = cups
        load printers = yes
        cups options = raw
        # 简单理解就是配置了这一串就不用用户名密码也可以访问了
        map to guest = Bad User

[homes]
        comment = Home Directories
        valid users = %S, %D%w%S
        browseable = No
        read only = No
        inherit acls = Yes

[printers]
        comment = All Printers
        path = /var/tmp
        printable = Yes
        create mask = 0600
        browseable = No

[print$]
        comment = Printer Drivers
        path = /var/lib/samba/drivers
        write list = @printadmin root
        force group = @printadmin
        create mask = 0664
        directory mask = 0775

[AlunFiles]
		# 注释,说明改共享文件的信息
        comment = This is  Alun's folder!
        # 共享目录的路径 绝对路径
        path = /mnt/folder1
        # 是否允许匿名访问
        public = yes
testparm # 命令
#正确提示
#提示 Load smb config files from /etc/samba/smb.conf
#提示 Loaded services file OK.
#提示 Server role: ROLE_STANDALONE

#错误提示
[root@localhost ~]# testparm
#Load smb config files from /etc/samba/smb.conf
#报错内容指引: set_variable_helper(ye): value is not boolean!
#Error loading services.
配置保存完成之后在所填入的path路径必须创建一个相同的目录否则无法正常访问。
mkdir /mnt/folder1 # 创建一个目录
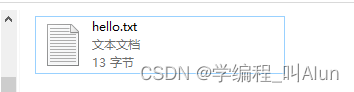
echo hello world! > /mnt/folder1/hello.txt # 创建一个有内容的文件
-
物理机(Windows系统)操作
win + r:弹出的运行窗口中输入\samba服务IP地址
去虚拟机中使用ifconfig命令查出来
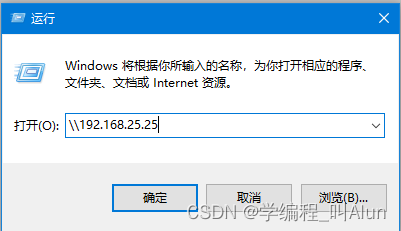
连不上的话试试重启一下smb服务,连接成功显示
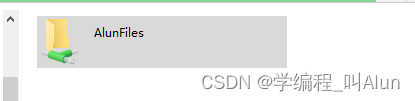
点击进去,会有我们刚刚创建的文件
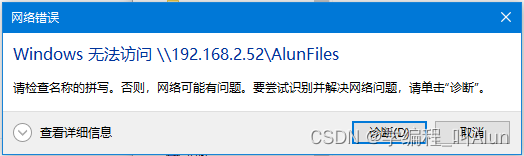
如果提示网络错误,无法访问,想想有没有创建一个相同的目录。
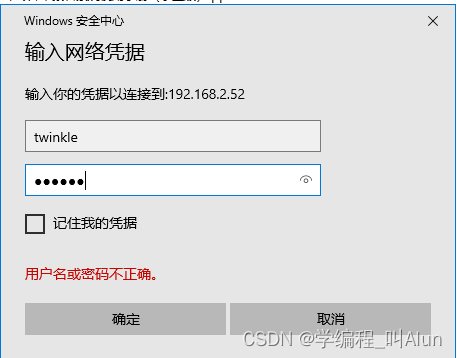
三、配置用户访问
root 用户下
useradd twinkle # 创建一个新用户
passwd twinkle # 设置用户登录系统的密码 这一步可有可无
smbpasswd -a twinkle # 设置账号用于登录samba服务器,同时并设置密码。
# 查询是否添加成功
pdbedit -L
#显示 twinkle:1003:
- 将配置文件global中的允许匿名访问删掉map to guest = Bad User,并把共享服务信息中public的属性改为no
- 在物理机进行连接,先关闭之前匿名连接的所有资源管理器窗口
登录成功,就可以看到两个文件夹了。
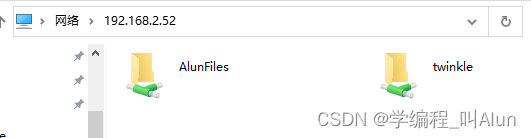
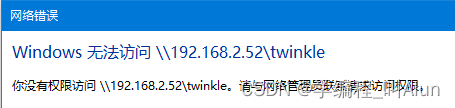
如果里面AlunFiles没有东西,twinkle文件夹并提示没有权限访问的时候。说明你没有关闭selinux防火墙,在linux使用setenforce 0,并重新连接即可。
断开连接
> net use * /del /y # 断开所有远程连接
原文地址:https://blog.csdn.net/qq_35317306/article/details/125426704
本文来自互联网用户投稿,该文观点仅代表作者本人,不代表本站立场。本站仅提供信息存储空间服务,不拥有所有权,不承担相关法律责任。
如若转载,请注明出处:http://www.7code.cn/show_33038.html
如若内容造成侵权/违法违规/事实不符,请联系代码007邮箱:suwngjj01@126.com进行投诉反馈,一经查实,立即删除!
声明:本站所有文章,如无特殊说明或标注,均为本站原创发布。任何个人或组织,在未征得本站同意时,禁止复制、盗用、采集、发布本站内容到任何网站、书籍等各类媒体平台。如若本站内容侵犯了原著者的合法权益,可联系我们进行处理。